Imagine what life was like around here in the 50s. I'm not talking about the 1950s when I was born. I'm talking about a hundred years before that, in the 1850s.
Back then, all of Springfield's public water came from a single pump on the southwest corner of the town square. That's where you got your water for bathing, drinking, cooking and gardening. Water for fighting fires came from eight cisterns, which often were dry. If you lived out in the country, your water would be pumped out of a well by a windmill.
Back then homes were lit by candles and coal oil lamps. It wasn't until 1855 that the first gas lights were installed. And electricity didn't start showing up in homes until the 1880s.
All the cooking was done in a fireplace hearth or on wood-burning or coal-burning stoves. Mary Lincoln cooked in their home's open hearth until 1856, when Abraham bought her a free-standing wood stove. Gas ranges were still another 50 years off.
You wouldn't have a refrigerator until the turn of the century. Before that, you would have had to rely on ice boxes. During the winter months, the lakes would freeze and large blocks of ice would be carved out and stored in ice houses, and insulated with straw or sawdust, where these blocks of ice could last for many months. Homes would have an icebox on the back porch so the iceman could fill it without having to come inside the house.
Without refrigeration, you had to know how to preserve food to survive the winter. Without these survival skills, getting through the cold winter months would have been impossible. Meat was cured, smoked and made into hams, bacon and sausages, or dried and made into jerky. As produce came into season, whatever was not eaten was preserved for the cold months ahead. There was usually a root cellar dug below the frost line for storing such things as apples, potatoes, carrots, hard squash and turnips. Berries and stone fruits were cooked with sugar and made into jams. The more perishable vegetable varieties were preserved by salt-fermenting in wooden barrels or ceramic crocks.
During the warm months, as each vegetable came into season, it would find its way onto your family's dinner table. You would always try to grow more food than your family could consume fresh, and the rest would be preserved for the cold months when fresh food was unavailable.
The basic principle behind food preservation is to prevent harmful bacterial growth in a food product, and there are several ways to accomplish this. The main factor in food spoilage is the water content. Without water, bacteria can't grow. Simple drying can preserve a variety of foods. Examples are meat jerky and raisins. Dry salting is another method. Salt draws out water. This method was commonly used to preserve meat. Dried and salt-cured meats were often secondarily smoked; this helped prevent the outer layers of fat from going rancid.
Sugar has moisture-removing qualities similar to salt. Fruits could be dried and coated in crystallized sugar, preserved in sugar syrup, or made into jams and jellies.
Vegetables were preserved by fermenting in a saltwater solution or brine. In addition to drawing out water, salt prevents the growth of many harmful bacteria that can cause food spoilage. An exception is a type of bacteria known as lactobacillus, which naturally occurs on the surface of vegetables. Lactobacillus bacteria can tolerate salt and convert the sugars in fruits and vegetables into lactic acid. The acidic environment further prevents spoilage. Fermented foods were the original probiotics. Eating unpasteurized fermented foods is very beneficial to gut health and overall well-being.
In modern times, we are experiencing an epidemic of obesity, diabetes, heart disease and mental illness – all a consequence of our modern diet of highly processed, chemical-laden foods. The benefits and importance of eating fermented foods are now widely accepted by the medical community. It's time to revisit the wisdom of our ancestors.
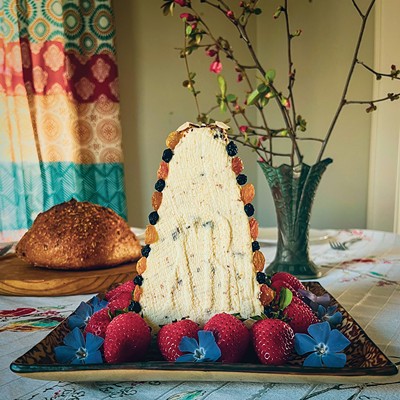
Lacto-fermented mixed pickles
Ingredients
4 cups total of the following vegetables (enough to fill a quart jar): Fresh green beans, sweet corn, cabbage
Uniodized salt
Filtered water
Equipment needed:
Kitchen scale
Wide-mouth quart jar and lid
Vented fermentation lid (such as Easy Fermenter)- optional
Fermentation weight-optional (substitute a sterilized river stone or a resealable bag with extra brine)
Preparation
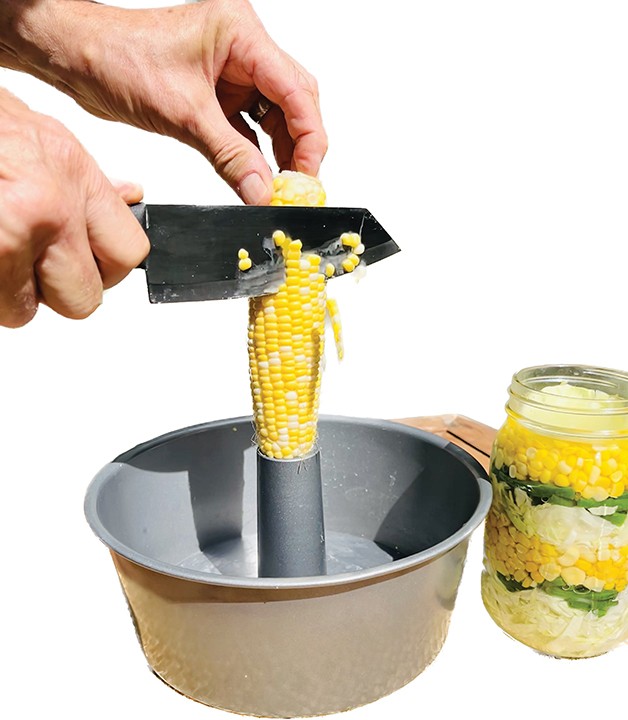
String green beans if needed and cut them in half. Remove corn kernels from the cob with a knife. Blanch the corn and beans in a pot of boiling water for about 2 minutes, then plunge them into a bowl of ice water to stop the cooking. Drain in a sieve or colander. Set aside one of the outer leaves of the cabbage and thinly slice the cabbage.
On a kitchen scale set to grams, weigh and record the weight of your jar. Layer the cut vegetables in the jar, pressing down to fit as many as you can up to the shoulder of the jar, leaving 1½-inch headspace. Using the jar lid as a template, cut out a circle of cabbage from the reserved outer leaf and place it on top of the vegetables.
Add enough water to cover the vegetables. Weigh the filled jar and subtract the weight of the empty jar to determine the total weight of the vegetables and water. Multiply the total weight by .02 to determine the amount of salt needed to make a 2% brine. Pour out the water into a small saucepan, add the salt, and heat on the stove, stirring, until the salt dissolves. Cool to room temperature and pour back into the jar.
Place a weight on top of the vegetables to keep them from floating. You can use a fermentation weight, a clean river stone or a plastic bag filled with some more brine. Loosely place the lid on the jar to allow gases to escape or use a vented fermentation lid.
Put the jar in a cool, dark place, like a basement, and let this ferment for at least five days, and up to two weeks. Sometimes the brine will overflow during the fermentation process so place your jar on a tray or several thicknesses of newspaper. If using regular lids, burp daily to release excess pressure.
After five days, taste the vegetables and continue to ferment until you achieve your desired flavor and texture. Then place in the refrigerator – the flavor will continue to develop. Skim any mold that forms on top.