Drip, drip, drip . . . It had been below freezing overnight, but by noon the sun was warm. I took my then-4-year-old daughter, Ashley, outside to enjoy the beautiful sunny day, the most extended outdoor excursion we’d had since we’d built a snowman a few weeks before.
Drip, drip, drip . . . We could hear drips all around us, but where were they coming from? It hadn’t rained the night before. The blue sky was completely cloudless.
Then drops began landing on our arms and Ashley touched her tongue to one. “It’s kind of sweet!” she said. Of course – the sap was flowing. When we moved into our old farmhouse there were 22 sugar maples on our 2.5 acres. The trees weren’t an unalloyed pleasure; there was little space on our wooded lot for the garden we wanted. Even so, in spring, when their lacy strands of pale-green flowers dangled above the wildflower-carpeted ground, when their shade in summer provided a respite on even the hottest days, in fall when they formed a canopy of shimmering gold, and in winter, when more cardinals than we could count perched on their snow-covered branches, we weren’t complaining.
Always eager to expose my children to new experiences, I said to Ashley, “Remember when we went to Lincoln Memorial Garden and saw them make syrup? We can do the same thing with our own trees. They have taps there for sale; let’s go get some and we’ll make our own syrup.”
Little did I know what I’d let myself in for. On that sunny day, we purchased about three dozen taps (large trees can support multiple taps) and set out to make our own syrup. We tapped the trees, cleaned plastic gallon jugs to hang on the taps, and watched as the sap dripped steadily into them. The next morning all the jugs were overflowing. “This is great!” I thought. I knew that it takes about 40 gallons of sap to make one gallon of syrup. “We’ll have enough syrup to last us all year.” We dumped the slightly sweet, watery liquid into big pots, put the jugs back on the taps and brought the pots into the kitchen to boil down. By mid-afternoon the sap was nowhere near becoming syrup, and when I looked outside I could see that the jugs were once again overflowing.
I’d opened a Pandora’s box. Ashley and our two older children were initially thrilled to help bring in the sap, but their enthusiasm quickly faded as day after day they had to lug in jug after jug. Our old farmhouse kitchen wasn’t up to the task, either. There wasn’t an exhaust fan over the stove, and the syrup literally boiled the finish off the kitchen cabinets. We didn’t have any problems with lack of humidity, though.
We ended up with about five gallons of syrup that first year. All of our friends – and even some folks we didn’t know all that well – benefited. Though some years we tap a few trees, we’ve never again made maple syrup on that scale, even though I now have a commercial-grade exhaust hood in my remodeled kitchen. Partly it’s because over the years age and disease have decimated some of our sugar maples, but mostly it’s because of the time and effort involved. But whether or not I’m planning on making maple syrup, I start listening for that drip, drip, drip in mid-February each year. It’s how I know for sure that spring is on its way.
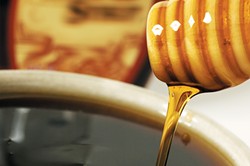
Even if you don’t have sugar maples and/or don’t have the time or interest to collect sap and make syrup yourself, you can participate in the experience during Maple Syrup Time at Lincoln Memorial Garden. For two weekends, from Feb. 20 to March 1, the Garden’s staff and volunteers will demonstrate the process of making maple syrup each Saturday and Sunday at 1 p.m. and 2 p.m. There’s a five-to-ten-minute orientation at the nature center, then participants head into the woods to identify a suitable tree for tapping. The tree is tapped, and if conditions are right (sap flows best if it’s been below freezing overnight, then warms to above freezing in the daytime), the sap immediately begins flowing. Visitors can taste the sap water and, after taking the sap to the evaporation shed, taste the syrup produced after hours of boiling. There is no charge and no need for reservations.
Maple Syrup Time is great fun for both adults and children. LMG recommends warm clothing and footwear suitable for muddy and/or slippery ground.
Roasted pork with maple-mustard glaze
- 3-4 lbs. boneless pork loin or tied boneless pork butt
- 2 c. buttermilk
- One large white onion, thinly sliced or diced
- 3/4 c. plus 1/2 c. pure maple syrup, divided
- 2 T. kosher or sea salt
- One bunch fresh sage leaves or rosemary, thyme or marjoram
- Freshly ground pepper
- 1 T. bacon fat or vegetable oil
- 1/2 c. stone-ground or Dijon mustard
Two days before you plan to serve the pork, combine the buttermilk, onion, salt, ¾-cup maple syrup and sage or other herbs in a large, resealable plastic bag. Squish the bag with your hands to dissolve the salt and combine the syrup and buttermilk. Add the pork loin and seal the bag, removing as much air as possible. Refrigerate for two days, turning the bag occasionally.
Remove the bag from the refrigerator three hours before you plan to start cooking the pork to allow the meat to come to room temperature.
Preheat the oven to 300 F. Heat the bacon fat in a large, ovenproof skillet and swirl it to coat the bottom of the pan, then pour off the excess.
Drain the marinade from the meat, pat the meat dry with paper towels, then sprinkle it liberally with freshly ground pepper. Brown the meat on all sides in the skillet over moderately high heat, then put the meat, uncovered, in the oven.
After 45 minutes, combine the remaining 1/2 cup of maple syrup and the mustard. Brush the meat with some of the mixture. Repeat every 15 minutes until the mixture is used up, then continue to baste with the pan juices.
Roast until a thermometer inserted halfway into the thickest part of the meat registers 150 F. Total cooking time will be between one-and-a-half and two hours. Let the roast stand for 15 minutes, then slice thinly and serve with the pan juices. Serves six to eight. Leftovers make great sandwiches.
Maple walnut pie
- Pastry for a single crust pie
- 3 eggs plus 1 beaten egg
- 1/2 c. pure maple syrup
- 1/2 tsp. kosher or sea salt
- 4 T. melted unsalted butter
- 2 tsp. cider vinegar
- 1 c. walnuts
Preheat oven to 425 F. Roll out pie dough into a roughly 11-inch circle and fit into a 9-inch pie pan. Carefully fit a piece of foil over the pastry and fill with dry beans or rice. Bake for 15 minutes. Remove the sheet of foil and rice, and brush the surface of the pastry with the beaten egg. Return to the oven for 5 minutes more. Cool to room temperature. Reduce the oven temperature to 375 F.
Beat the 3 eggs in an electric mixer until they begin to thicken. Add the syrup, butter, vinegar and salt. Stir in the walnuts. Pour into the partially baked pie shell and bake for 40 to 50 minutes, or until a knife inserted into the center comes out clean. Cool to room temperature before serving.
Contact Julianne Glatz at [email protected].

